Metal roofing has become an increasingly popular choice for residential, commercial, and industrial buildings due to its durability, energy efficiency, and aesthetic appeal. Whether you’re considering installing a metal roof for the first time or replacing an existing roof, understanding the installation process is key to achieving long-lasting results. This guide will provide an in-depth look at what you need to know about metal roof installation.
Benefits of Metal Roofing Installation
- Longevity: Metal roofs often last 40-70 years or more, far outliving asphalt shingles.
- Durability: Resistant to cracking, chipping, and warping; ideal for harsh weather conditions like heavy rain, snow, and high winds.
- Energy Efficiency: Reflective coatings on metal roofs can reduce cooling costs by reflecting UV rays.
- Environmentally Friendly: Most metal roofs are made of recyclable materials and can be recycled at the end of their lifespan.
- Style Options: Available in various colors and finishes to complement architectural designs.
Tools and Materials Needed for Installation
| Tool | Purpose |
| Measuring tape | Ensures accurate sizing of panels and trims |
| Metal snips | Used for cutting panels to fit |
| Drill/driver | Secures fasteners into place |
| Safety harness | Essential for fall protection when working on steep slopes |
| Chalk line | Helps mark straight lines for panel alignment |
- Metal panels (e.g., standing seam, corrugated sheets)
- Fasteners (galvanized screws with rubber washers)
- Flashing
- Underlayment (e.g., synthetic or felt)
- Sealant
Overview of the Installation Process
The process of installing a metal roof involves several critical steps. Attention to detail during each step ensures quality results.
- Assess the roof structure’s condition. If it’s compromised or sagging, repairs may be needed before proceeding.
- Measure your roof area accurately to determine how much material you’ll need.
- Remove old roofing if necessary unless installing over an existing layer (check local building codes).
- Clean the surface thoroughly.
- Install underlayment as a moisture barrier across the entire roof structure.
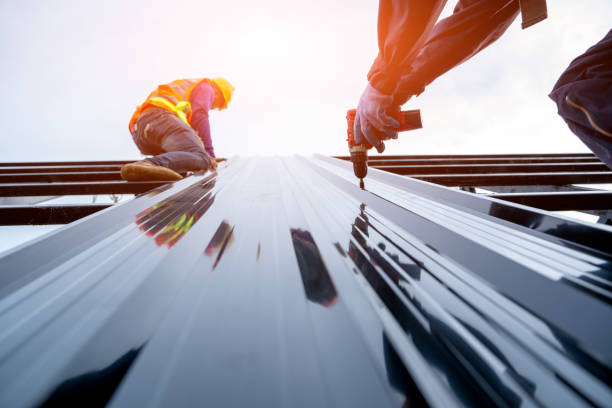
- Begin at one edge of the roof (typically away from prevailing winds).
- Overlap panels according to manufacturer specifications for proper water runoff.
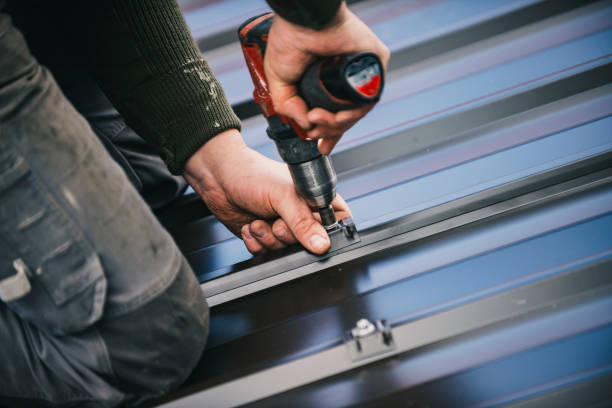
- Secure each panel with screws, ensuring proper alignment using chalk lines.
- Install flashing around chimneys, vents, skylights, valleys, or any protrusions where leaks are likely.
- Use sealant where flashing meets other materials.
- Attach ridge caps along peaks to provide ventilation and protect seams from weather exposure.
- Double-check all fasteners are tightened appropriately.
- Ensure no gaps exist that could allow water penetration.
Maintenance Considerations Post Installation
- Regularly check for debris buildup such as leaves or branches that may trap moisture.
- Inspect fasteners annually; tighten any loose screws as needed.
- Clean surfaces occasionally with water mixed with mild detergent if dirt accumulates significantly.
Investing time upfront during installation pays dividends by ensuring your new roof performs optimally over its lifespan while providing aesthetic value and efficiency benefits throughout its use.
Essential Steps for Installing Metal Roofing in San Diego, CA Explained
Proper installation of a metal roof is crucial for ensuring its longevity, durability, and overall performance. Below, we break down the critical steps involved in the metal roof installation process to help you better understand what goes into creating a reliable and efficient roofing system.
Initial Inspection and Preparation for Standing Seam Metal Roofs San Diego, CA
Before beginning the installation process, a thorough inspection of the building is essential. This step ensures that the structure can support the weight of a metal roof and identifies potential issues.
- Inspecting underlying structures: Check for signs of damage or rot in the existing roofing deck or support framework.
- Removing old roofing materials: If replacing an existing roof, clear away all old roofing material to create a clean surface for installation.
- Ensuring proper ventilation: Verify that attic spaces or other areas beneath the roof are adequately ventilated to prevent moisture buildup.
Measurements and Layout Planning with a Trusted Metal Roofing Company San Diego CA
Accurate measurements are key to reducing material waste and ensuring proper fit during installation.
- Measure roof dimensions precisely, including slope, angles, and ridges.
- Plan for overhangs, valleys, ridgelines, and other features that may require specialized cuts or additional flashing.
- Mark guidelines on the surface to maintain alignment during panel placement.
Underlayment Installation by a Trusted Metal Roofing Contractor San Diego, CA
The underlayment acts as an additional layer of protection between your home’s structure and environmental elements like water or wind.
- Use either synthetic underlayment or felt paper designed specifically for metal roofs.
- Securely fasten the underlayment to prevent shifting during panel placement.
- Ensure overlaps meet manufacturer specifications to create a watertight barrier.
Installing Flashing
Flashing helps seal vulnerable areas such as chimneys, valleys, skylights, vents, or edges where water infiltration is more likely.
- Begin by installing drip edges along eaves and gable ends.
- Position valley flashing in areas where two roof planes intersect.
- Use high-quality fasteners and sealants to secure flashing components.
Metal Panel Placement
The core part of any metal roofing project involves laying down panels systematically across your roof.
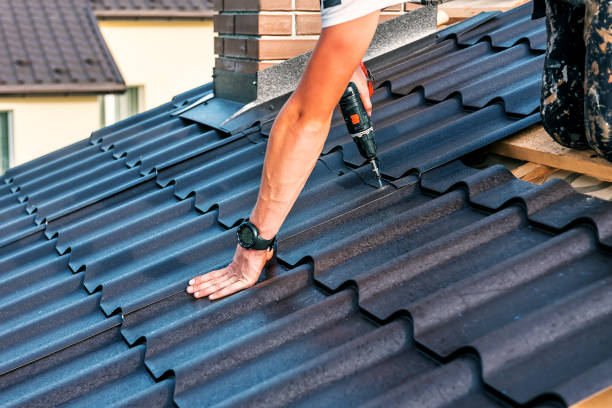
- Start at one end of your roof (usually at the bottom corner).
- Secure each panel using screws equipped with rubber gaskets to form a watertight seal.
- Overlap panels according to manufacturer guidelines—typically by one ridge—to ensure proper fitting and weather resistance.
- Repeat this process row by row until fully covered.
Tip: Always follow manufacturer-specific instructions for screw placement patterns to maximize durability while minimizing risk of leaks.
Adding Ridge Caps
Ridge caps are installed along the peak of your roof to protect seams where panels meet while allowing ventilation if needed.
- Align ridge cap pieces over ridgelines with appropriate overlap at seams.
- Secure caps using screws or nails compatible with both caps and panels beneath them.
- Add foam closures beneath ridge caps if required for additional sealing against pests or debris intrusion.
Final Inspection
- Check for loose screws or improperly sealed joints that could allow water penetration.
- Remove any debris from surfaces before finishing touches like painting (if applicable).
- Ensure gutters are clear so they can effectively channel rain away from your home’s foundation once installation is complete.
| Step | Key Tasks Involved |
| Initial Inspection | Assess structural integrity; remove old materials |
| Measurements & Layout | Take precise measurements; plan layout |
| Underlayment Installation | Lay protective layer over decking |
| Flashing Installation | Seal vulnerable points (chimneys/valleys) |
| Panel Placement | Attach panels securely across entire surface |
| Ridge Cap Addition | Install caps along peaks |
| Final Inspection | Verify durability; address minor adjustments |
Properly following these steps ensures not only an aesthetically pleasing outcome but also functionality that will stand up against time and harsh weather conditions alike!
Critical Steps Involved in the Metal Roof Installation Process Explained
Proper installation of a metal roof is essential to ensuring its longevity, durability, and peak performance. Below is a detailed explanation of the critical steps involved in the metal roof installation process, from preparation to final touches.
1. Preparing the Roof Surface
- Removing existing roofing materials: If applicable, remove old shingles or other roofing materials to create a clean surface.
- Inspecting for damage: Check for damaged or rotten decking and replace any compromised sections.
- Installing an underlayment: A high-quality underlayment, such as synthetic felt or self-adhering membrane, acts as a moisture barrier and provides added protection.
2. Measuring and Planning
- Measuring roof dimensions (length, width, slope).
- Accounting for overhangs and penetrations like chimneys or vents.
- Creating a layout plan for panels and fasteners.
Using precise calculations helps prevent errors during material ordering and ensures panels fit as intended.
3. Installing Flashing
| Flashing Type | Purpose |
| Valley flashing | Protects valleys where two roof planes meet. |
| Wall flashing | Seals where the roof meets vertical walls or dormers. |
| Chimney/vent flashing | Provides waterproofing around chimneys, vents, or pipes. |
Securely install flashing with corrosion-resistant fasteners and sealant to create watertight barriers.
4. Installing Metal Panels
- Start at one edge: Begin by attaching the first panel at one corner of the roof using screws with rubber gaskets.
- Overlap correctly: Overlap adjacent panels according to manufacturer guidelines to prevent water penetration.
- Securing fasteners: Use properly spaced fasteners; over-tightening can deform panels while under-tightening reduces stability.
- Cutting custom pieces: For edges or irregular areas, cut panels carefully with specialized tools like shears or nibblers.
5. Adding Ridge Caps and Trim
Ridge caps are installed along peaks to seal seams between roof planes while providing ventilation when necessary. Edge trim pieces are also attached for a polished appearance and additional weatherproofing.
6. Performing Final Inspections
- Verify that all fasteners are secure.
- Check for gaps in flashing or seams that could allow leaks.
- Remove debris from gutters caused by cutting metal sheets during installation.
A meticulous inspection ensures your new metal roof functions effectively against weather elements while enhancing curb appeal.
By following these critical steps carefully, homeowners or professionals can achieve a durable metal roofing system that stands up against time while delivering superior performance year-round.
How Important Is Planning and Preparation Before Installing a Metal Roof
Proper planning and preparation are critical to the success of any metal roofing installation project. Skipping this vital stage can lead to costly mistakes, inefficiencies, and even long-term issues with your roof’s performance. Below, we’ll explore why preparation is key and outline the steps necessary for a smooth and effective installation process.
Benefits of Thorough Planning
Taking the time to plan ensures that: – The installation process is organized and efficient. – Materials are properly aligned with your design needs. – Potential risks or challenges are identified beforehand. – Costs remain within budget due to fewer unexpected expenses.
Failing to invest in proper preparation could result in structural damage, water leaks, or premature roof failure.
Steps for Effective Metal Roof Installation Preparation
- Conduct an inspection of your current roof structure. Look for damage such as rotting decking, sagging areas, or moisture build-up.
- Ensure the roof is structurally sound enough to support a metal roofing system.
- Carefully measure the dimensions of your roof area, including slopes and angles. Precision here minimizes waste by ensuring you order the correct amount of material.
- Research local building regulations and zoning laws related to metal roofing.
- Secure any necessary permits before beginning the project.
- Choose an underlayment compatible with your metal roofing type (e.g., synthetic or felt). This layer provides added protection against weather conditions.
- Assess ventilation needs based on building design and climate conditions. Proper ventilation prevents heat build-up and condensation beneath the roof panels.
Tools & Materials Checklist
| Tools | Materials |
| Tape measure | Metal panels |
| Roofing nails/screws | Ridge caps |
| Power drill | Flashing |
| Snips or shears | Appropriate underlayment |
| Safety harness gear | Closure strips |
Budgeting for Time & Costs
A well-prepared timeline prevents delays: – Allocate time for material delivery based on supplier lead times. – Build in extra days for weather-related interruptions if applicable. Cost planning is equally important—factor in labor (if hiring professionals), materials, equipment rental (if needed), and unforeseen expenses.
Common Mistakes During Preparation
Avoid these common issues: – Underestimating material needs due to inaccurate measurements. – Ignoring ventilation systems that extend roof lifespan. – Skipping inspection of existing structures for rot or damage.
By dedicating time upfront to planning and preparation, you set the foundation for a durable, efficient metal roofing system that will serve your property for decades with minimal maintenance required.
Key Factors to Consider When Selecting the Best Metal Roofing Materials
When selecting metal roofing materials for your home or building, it’s essential to consider several important factors. The right choice can enhance the durability, appearance, and energy efficiency of your roof while also aligning with your budget and environmental goals.
Types of Metal Roofing Materials
- One of the most common choices due to its affordability and strength.
- Often coated with zinc (galvanized) or a combination of aluminum and zinc (galvalume) for corrosion resistance.
- Lightweight and naturally resistant to rust, making it ideal for coastal areas.
- Requires minimal maintenance but can be more expensive than steel.
- Renowned for its visual appeal and ability to develop a natural patina over time.
- Long-lasting but comes at a premium price point.
- Known for self-healing properties; it can repair scratches over time by forming a protective coating.
- Highly durable and eco-friendly but generally more costly.
- Tin (less common today)
- Historically used in roofing but has largely been replaced by modern alternatives like steel or aluminum.
Key Factors to Evaluate
- Climate Compatibility The local weather conditions play a significant role in determining the best material:
- For regions prone to heavy rain or snow, consider materials with high durability.
- Coastal areas are better suited for aluminum due to its corrosion resistance.
- Hot climates benefit from reflective metal roofs like zinc or aluminum that reduce heat absorption.
- Budget Constraints Your budget will heavily influence your options:
- Steel is typically the most affordable without sacrificing performance.
- Copper and zinc may require a higher upfront investment but last significantly longer.
- Aesthetic Appeal The appearance of your roof impacts curb appeal:
- Copper offers a classic look that evolves over time.
- Steel panels come in various colors and finishes thanks to paint or polyester coatings.
- Weight Considerations Ensure that your building structure can handle the weight: | Material | Approximate Weight per Square Foot | |————-|————————————| | Steel | ~1.5 lbs | | Aluminum | ~0.7 lbs | | Copper | ~2 lbs |
- Environmental Impact Certain metals like aluminum or recycled steel are more sustainable options due to their recyclability and lower environmental footprint during production.
- Maintenance Needs Some materials require regular upkeep:
- Galvanized steel may need periodic inspections for scratches or rust spots.
- While copper is nearly maintenance-free, it can discolor if not treated properly.
Matching Metal Type With Roofing Style
The type of material you choose should align with the style of your roof: – Standing seam systems typically use steel or aluminum because they hold up well against expansion/contraction cycles. – Shingles made from copper or zinc provide an upscale, timeless aesthetic ideal for classic architecture styles.
By carefully evaluating these factors, you can ensure that your metal roofing investment adds both value and durability to your property while meeting functional and aesthetic needs alike.
Understanding the Environmental Benefits That Metal Roofing Can Offer
Metal roofing has gained popularity not only for its durability and aesthetic appeal but also for its significant environmental advantages. As sustainability becomes a larger concern for homeowners, builders, and architects, metal roofing presents itself as a superior option for eco-conscious construction. Below, we explore the ways in which metal roofs contribute positively to the environment.
1. Energy Efficiency
- Cool Roof Technology: Many metal roofs are coated with reflective pigments that help maintain cooler indoor temperatures by deflecting sunlight.
- Reduced HVAC Usage: By naturally regulating indoor temperatures, homeowners rely less on heating or cooling systems, directly cutting energy consumption.
A properly installed metal roof can reduce cooling energy use by up to 25%, making it an environmentally friendly choice over traditional roofing materials like asphalt.
2. Recyclability and Reduced Waste
- 100% Recyclable: Metal roofing materials such as steel, aluminum, and copper can be recycled indefinitely without degrading in quality.
- Less Landfill Contribution: Unlike asphalt shingles that typically end up in landfills after their life span (20–30 years), discarded metal roofing materials can reenter manufacturing cycles.
| Roofing Material | Recyclability (%) | Average Lifespan (Years) |
| Metal Roofing | 100% | 40–70+ |
| Asphalt Shingles | ~0% | 20–30 |
This reduced waste contributes significantly to minimizing environmental impact over time.
3. Longevity Reduces Resource Consumption
- A well-maintained metal roof may last anywhere from 40 to 70 years, meaning fewer resources are required for manufacturing and installation during a building’s lifespan.
- Durability against weather conditions such as heavy rain, snow, or high winds further ensures minimal maintenance needs.
Fewer replacements mean fewer raw materials used over time—a critical aspect of sustainable construction practices.
4. Compatibility with Renewable Energy Systems
- Ease of Installation: Their structure allows for efficient mounting of solar panels without compromising the roof’s integrity.
- Improved Solar Efficiency: The reflective surface of a metal roof complements solar panels by reducing heat absorption, improving overall system performance.
This synergy makes them an ideal choice for homeowners looking to maximize renewable energy usage while lowering their carbon footprint.
5. Reduced Urban Heat Island Effect
- They minimize heat absorption by reflecting more sunlight back into the atmosphere.
- Cooler rooftops contribute to reducing ambient temperatures in urban environments.
By addressing this issue on a larger scale, communities can benefit from lower overall energy demands during hot seasons.
Choosing a metal roof is not just an investment in long-term durability but also a step toward environmentally responsible living. Its recyclability, longevity, and contribution to energy efficiency make it one of the most eco-friendly options available today.
- Tips for Choosing the Best Installation Method for Standing Seam Metal Roofs San Diego, CA
- Metal Roof Installations San Diego, CA: A Comprehensive Guide to Metal Mastery
- Exploring the Benefits and Basics of Metal Roofing San Diego, CA
- A Comprehensive Guide to Metal Roof Installations San Diego, CA: Everything You Need to Know
- The Ultimate Guide to Metal Roof Installations San Diego, CA
- The Ultimate Guide to Metal Roof Installations San Diego, CA and Their Benefits
- The Ultimate Guide to Metal Roof Installations San Diego, CA for Your Home